1. 前言
nginx模块五花八门,直接用dnf或yum安装的话会少了很多乐趣,这边我又看上了一个 nginx-module-vts 监控模块,这里把安装过程记录下来,以便以后安装用到。
2. 安装 libunwind-devel
dnf install libunwind-devel3. 安装 gperftools 优化nginx内存管理
git clone https://github.com/gperftools/gperftools.git
./configure --enable-frame-pointers --enable-libunwind
make
make install
4. 下载 nginx-module-vts
git clone git://github.com/vozlt/nginx-module-vts.git5. 下载并编译nginx
wget http://nginx.org/download/nginx-1.22.1.tar.gz
tar zxvf nginx-1.22.1.tar.gz
cd nginx-1.22.1
./configure --user=www --group=www --prefix=/usr/local/nginx --sbin-path=/usr/local/sbin/nginx --conf-path=/usr/local/etc/nginx/nginx.conf --error-log-path=/var/log/nginx/error.log --http-log-path=/var/log/nginx/access.log --pid-path=/var/log/run/nginx.pid --with-http_ssl_module --with-http_realip_module --with-http_addition_module --with-http_sub_module --with-http_dav_module --with-http_gzip_static_module --with-http_stub_status_module --with-http_perl_module --with-google_perftools_module --with-http_v2_module --with-http_mp4_module --with-http_gunzip_module --with-http_gzip_static_module --with-http_auth_request_module --with-http_random_index_module --with-http_secure_link_module --with-mail --with-http_degradation_module --with-google_perftools_module --add-module=../nginx-module-vts
make
make install
6. 设置系统服务启动脚本
/etc/systemd/system/nginx.service[Unit]
Description=The nginx HTTP and reverse proxy server
After=network.target remote-fs.target nss-lookup.target
[Service]
Type=forking
PIDFile=/run/nginx.pid
# Nginx will fail to start if /run/nginx.pid already exists but has the wrong
# SELinux context. This might happen when running `nginx -t` from the cmdline.
# https://bugzilla.redhat.com/show_bug.cgi?id=1268621
ExecStartPre=/usr/bin/rm -f /run/nginx.pid
ExecStartPre=/usr/local/sbin/nginx -t
ExecStart=/usr/local/sbin/nginx
ExecReload=/bin/kill -s HUP $MAINPID
KillSignal=SIGQUIT
TimeoutStopSec=5
KillMode=mixed
PrivateTmp=true
[Install]
WantedBy=multi-user.target7. 启动 nginx
systemctl start nginx8. 如发现的问题
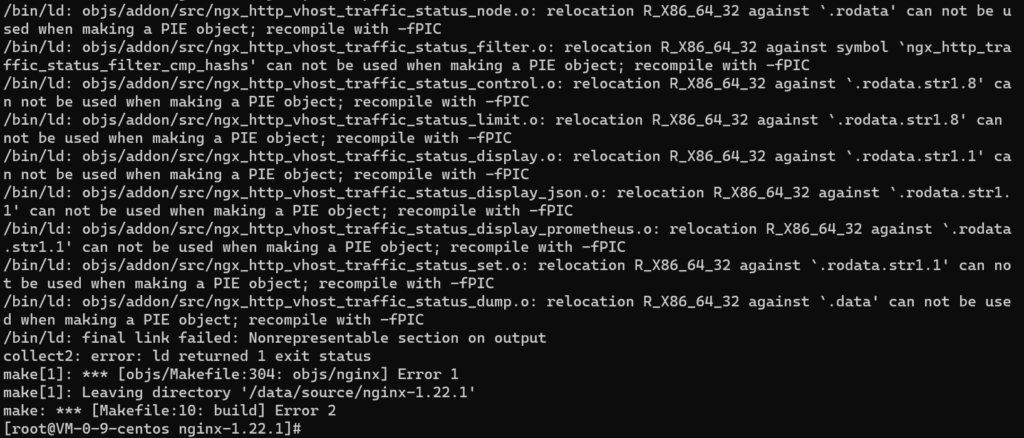
编辑: nginx-1.22.1/objs/Makefile
在 CFLAGS = -pipe -O -W -Wall -Wpointer-arith -Wno-unused-parameter -Werror -g
最后加上 -fPIC
CFLAGS = -pipe -O -W -Wall -Wpointer-arith -Wno-unused-parameter -Werror -g -fPIC
记得 -fPIC 后面要留一个空格!
再重新 make


 :bi...
文章评论